9.4 Send Estimate Via Share Link. Version 1.0. Last updated July 2025
An estimate is a detailed breakdown of all required work within a job. You can have multiple estimates within the same job if required.
Note: The Job must have been created in Contractor Workspace before you can create an Estimate. Please refer to Quick Reference Guide - Create a Job
Create Estimate Share Link To Send To Third Party
You may send an estimate to a third party via share link, who can complete the estimate on your behalf.
 From the main navigation menu select Jobs and search for the job associated with the required Estimate
 When you open the job, the jobs menu will be displayed. Select Estimates from the Jobs menu.
 Select Create New Estimate button at the top of the page.

 Click the New Share Link button in the top right corner of the estimate screen.

 Adjust the valid period of the link if required (this will default to 1 month).

 Select which contact the Share Link is being assigned too, or use the tick box to select 'Allow Anyone to View the Link'.

 You can attach documents for the third party to view when creating the estimate Share Link
 Use the Options boxes to select what the external party will see when completing the estimate. The options are Show Rates, Hide Material and Hide Labour.

Click the Share button in the bottom right hand corner of the pop up box to create share link.
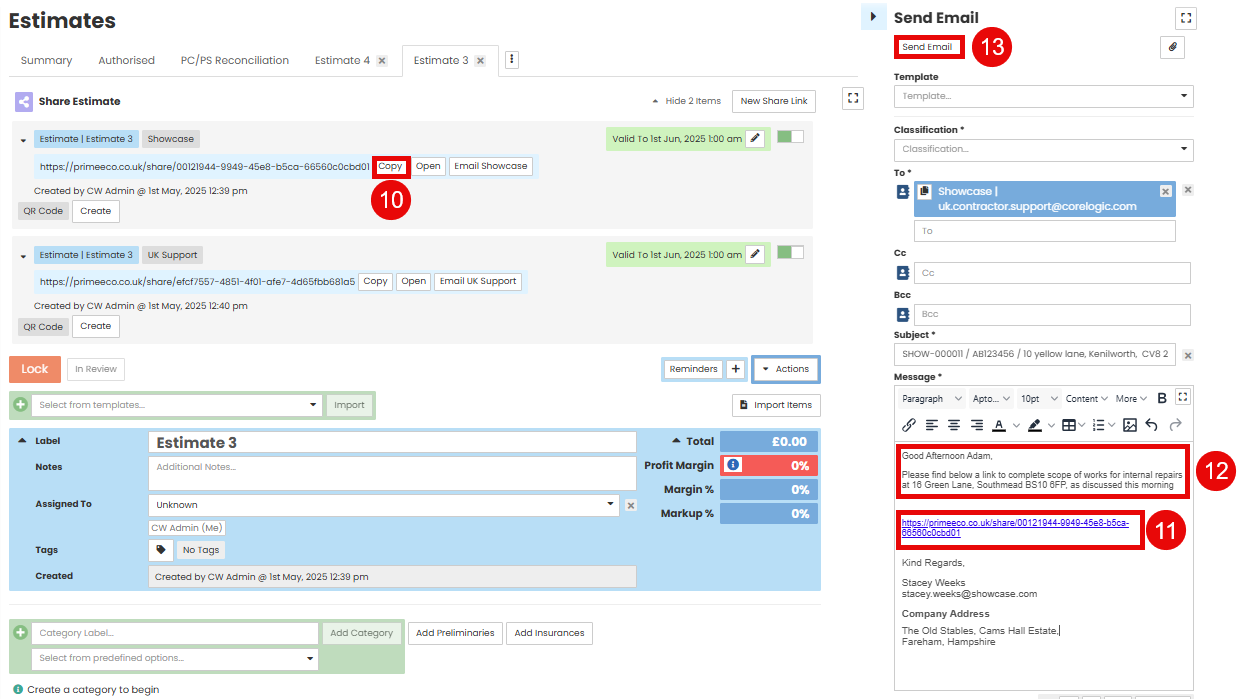
 Click the Email (Contact Name) button to open the email form on the right hand side of your screen. This will auto fill the email address in the To field.

 Click the Copy button next to the share link.
 Paste the link into the body of the email form.
 Enter any additional details within the e-mail.
 Click Send Email.
Third Party Complete Estimate and Send Back to Contractor Workspace
Once the external party receives the Share Link, they can click the link provided and follow the below steps to complete the estimate and submit it back to Contractor Workspace.

 Type the Category label e.g. bedroom, kitchen, utility etc in the green plus field underneath the estimate details. Click Add Category button on the right hand side.

 Click the New Item button underneath the category to build out your estimate line items.

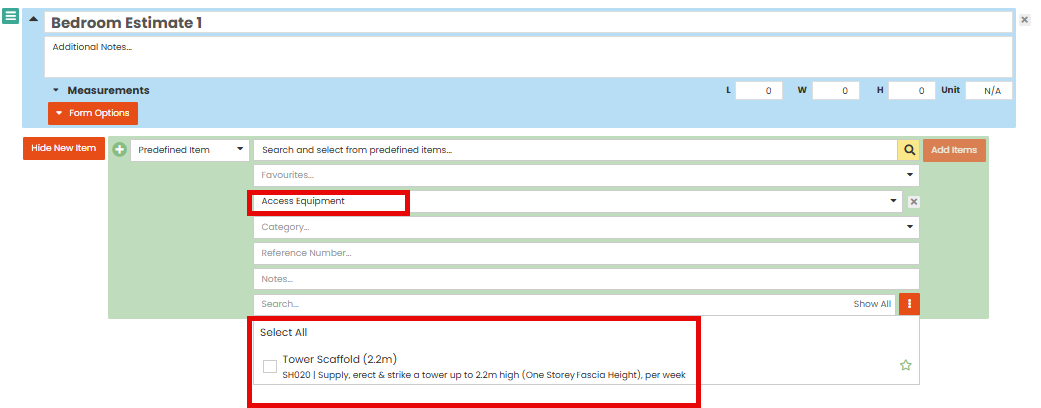
 Use the first drop down to select the type of line item you want to use, this includes Predefined Items and Recipes.
 Note: If selecting Predefined items use the search function to find the item
 Once items have been selected, Click the Add Item button on the right-hand side
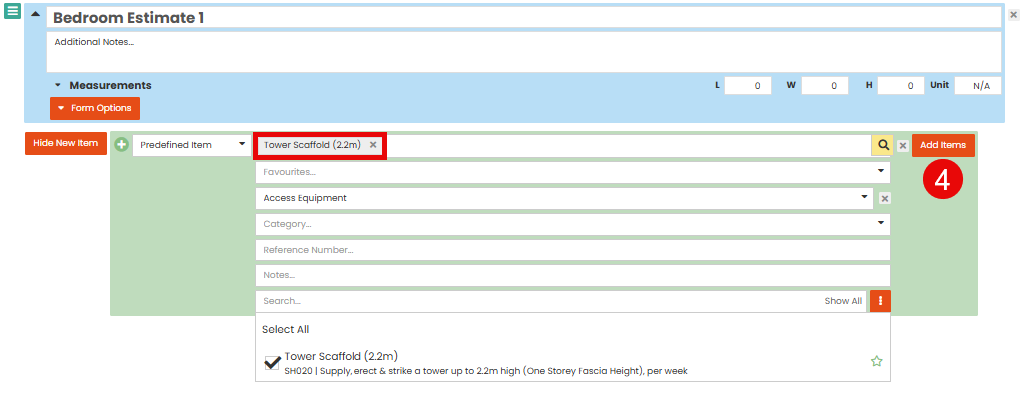
 The line item will appear under the category heading and you can make any edits to it.

Note: The sender can choose what information is visible to the third party in the estimate. This will depend on the options selected when creating the share link e.g. in this example Show Rates was not selected, so rates are not available for the third party to see. Hide material and Hide labour were not selected so these fields are unavailable for the third party to view and edit
 Add the next room/area by typing the label into the blue plus Category field at the top of the Estimate. Click Add Category.

 Once all required items have been added to the estimate, scroll back to the top of the screen and click Submit for Review.

 You will get an Are you Sure? pop up message, click Yes.
Note: Once submitted the third party will not be able to edit the estimate

 Once it has been submitted the estimate will be visible in Contractor Workspace. You will be able to see the Estimate within the job, in the status of 'In Review'.

Authorise a Pending Estimate Returned by a Third Party
Once the third party has completed their estimate via the share link and submitted, you can review and authorise or reject the estimate within Contractor Workspace.
 Locate the required job and select Estimates from the Job menu.
 The pending estimate will have a status of ‘In Review’

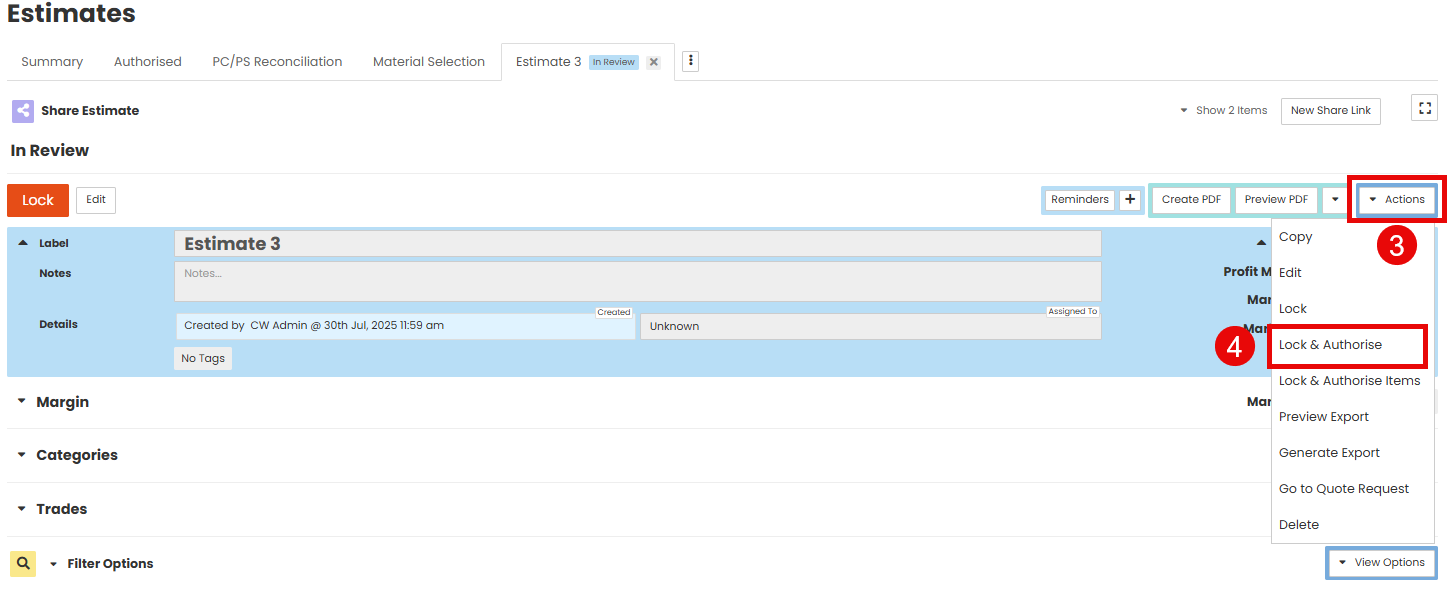
 Select Actions
 To lock and authorise All items, select Lock and Authorise. Alternatively, you may select Lock and Authorise Items to select individual line items from the estimate
You will receive a pop up message, select Yes to confirm

The Estimate Items have now been authorised, and will also be visible in the Job Summary Tab

Was this article helpful?
That’s Great!
Thank you for your feedback
Sorry! We couldn't be helpful
Thank you for your feedback
Feedback sent
We appreciate your effort and will try to fix the article