16.4 Accounts Receivable Invoice - General. Version 1.0. Last updated July 2025
Create Accounts Receivable Invoice
This article will take you through the process of creating an Accounts Receivable Invoice.
Navigate to the job the invoice is for, and select the Finance option from your Job menu.

Click on the Accounts Receivable Invoices tab across the top of the page

Select the invoice details

 Type (Required) – The type of invoice e.g. authorised works or allocations.
 To (Required) – Who the invoice will be addressed to. Anyone assigned on the job will be in the list to select from, Customer, Client etc.
 C/O - allows you to specify an intermediary recipient for the invoice, useful when the primary recipient doesn't typically receive correspondence directly.
 Account No. – these will link back to your accounting software and categorise your invoices.
 Create - You will be taken into the invoice where you can add items and costs.
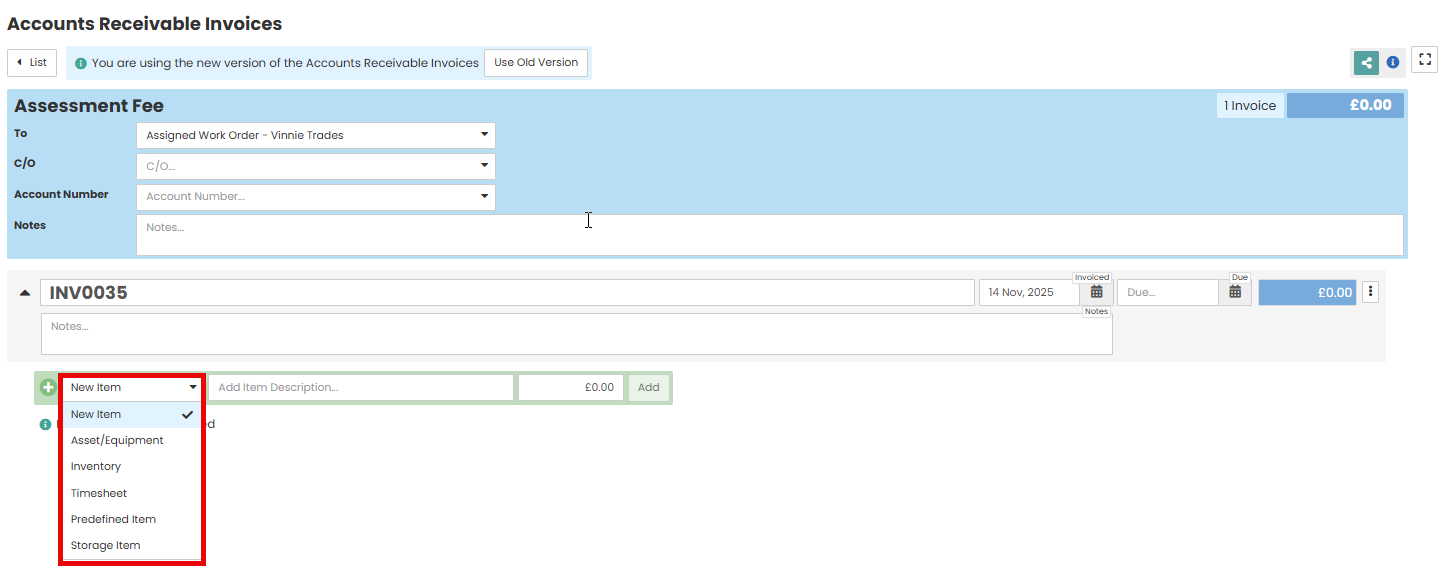
The invoice and invoice number is populated automatically but can be edited if required.

Note - Depending on the Invoice type, the items you can add to the AR invoice will vary.
The standard list of items is: New Item (manual cost), Asset/Equipment, Inventory, Timesheet, Predefined Item and Storage Item. If creating either an allocation or authorised works invoice, then you will have the option to add the allocation or an estimate/authorised works items that are ready to invoice.
Enter the invoice due date.

Enter the type, description and cost. Select Add
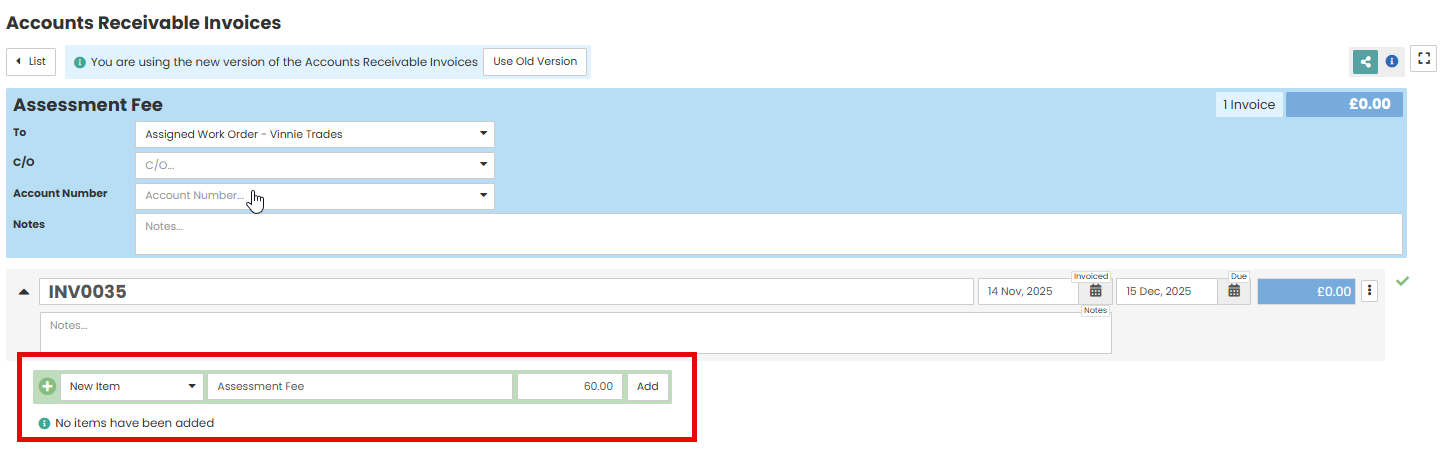
You can add multiple line items if required by repeating the above step.
Enter the Item Code (if appliable) and Account Number
Note - Item Code is utilised for linking this invoice to an external finance system. This is not a required field and you may not be utilising this field in your accounting system.

You can edit any Costs/Quantities if applicable. A green tick represents this value has been saved automatically.
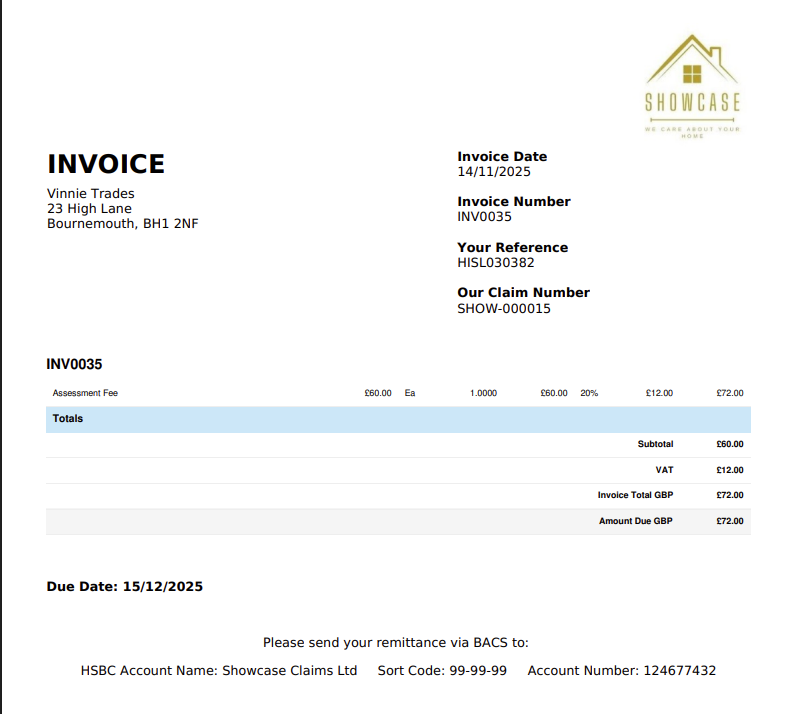
Select Create PDF. This will open the invoice template, which you may edit as required

In the template section, choose the invoice template you would like to use.

You can make any amendments within the template such as payment terms, or adding additional information/instructions.

If the invoice is complete, select ‘Generate and View to preview the PDF invoice.

Once the PDF been created you can either send it via email from your documents, or you can create a Payment Share Link.
To send/ sync the AR Invoice to your accounting system, you will need to change the invoice status from the default ‘Pending’ to ‘Approved.’ Click pencil icon on the line item.

A pop up will appear, change the ‘Invoice Status’ to ‘Approved’ using the drop down menu. This will trigger the API connection to your company accounting system and send the invoice across.

You may add any additional notes, or notify an internal party of the status change if required.
When an invoice is successfully sent to the accounting system the status will change to paid.

Was this article helpful?
That’s Great!
Thank you for your feedback
Sorry! We couldn't be helpful
Thank you for your feedback
Feedback sent
We appreciate your effort and will try to fix the article