16.3. Create AP Invoice. Version 1.0. Last updated July 2025.
Create an Accounts Payable Invoice on jobs
This article will take you through the process of creating Accounts Payable Invoices against the Work Orders in your jobs.
Once you receive your subcontractor and supplier invoices you can enter them into the job and match them to the work order you sent out. Then you can sync the invoice to your accounting system to pay the invoice.
To create an accounts payable invoice first ensure that a Work Order exists.
Navigate to the job the invoice is for, and select the Finance option from your Job menu.

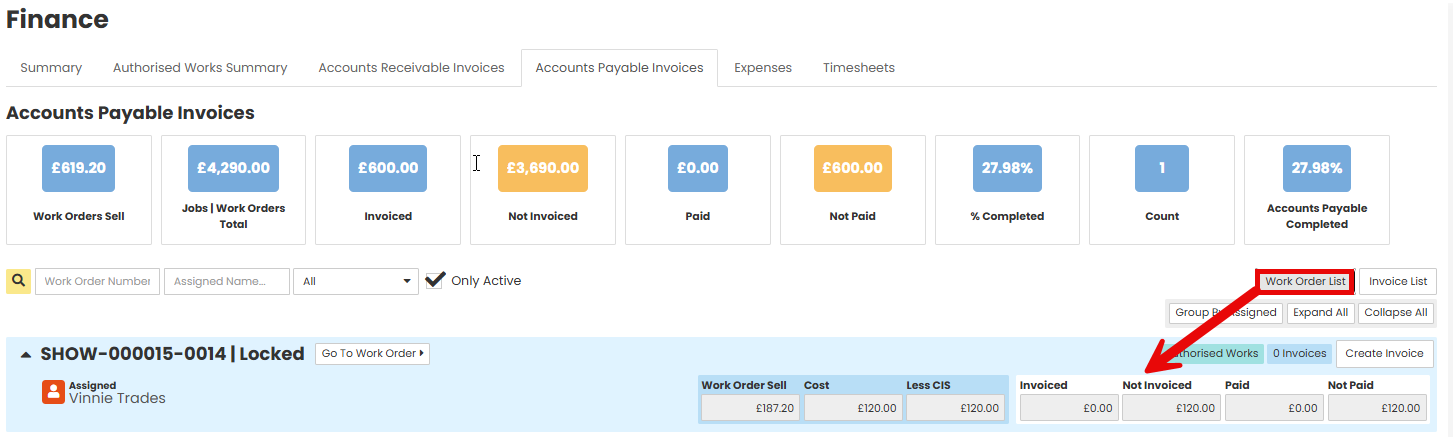
Click on the Accounts Payable Invoices tab across the top of the page

Note -There are two views available: the ‘Work Order list’, where you can select a work order to create an invoice, and the ‘Invoice list’, is where you can create an invoice and then link it to a Work Order.
To create the invoice from the Invoice list, you'll need to choose the associated Work Order from the list.

To create an invoice from the Work Order list, select ‘Create Invoice.’ The information from the work order will be auto populated into the form.
Regardless of which option you have chosen above to generate the invoice you will be required to complete the following ‘Accounts Payable Form’.

 Invoice Number - The invoice number on the subcontractor or supplier invoice
 Account Number - Select from the drop down. This is your chart of accounts from your accounting system
 Item Code - Utilised for linking this invoice to an external finance system. This is not a required field and you may not be utilising this field in your accounting system.
 Amount - You can either use the tick box next to the line item on the right hand side to pull the value into the amount, or you can manually enter the value into the amount field.
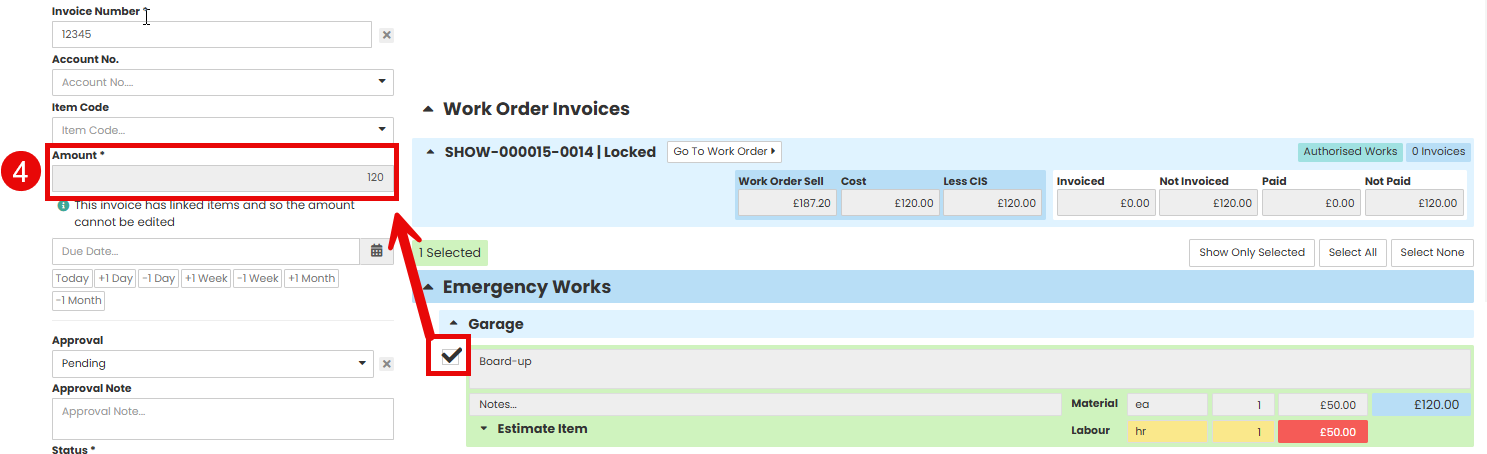
 Invoiced Date - Populate the field with the date of the invoice
 Due Date - Populate the field with the date the invoice needs to be paid
 Approval Status - Adjust this accordingly, if the invoice has been approved, set it to 'Approved,’ if not leave it as 'Pending' or choose another available status.
 Approval Note - Text field where you can include notes about why you are setting the approval status.
 Status - Select a status from the drop down
 Linked Document - Upload a copy of the invoice.
 Linked Timesheet - you can link a timesheet record to track labour costs.
 Notes - Add any necessary notes or details of the invoice if required.
 Final Invoice - Tick box you can select if the invoice entry is final. It will also move the Work Order status to complete if it isn't already
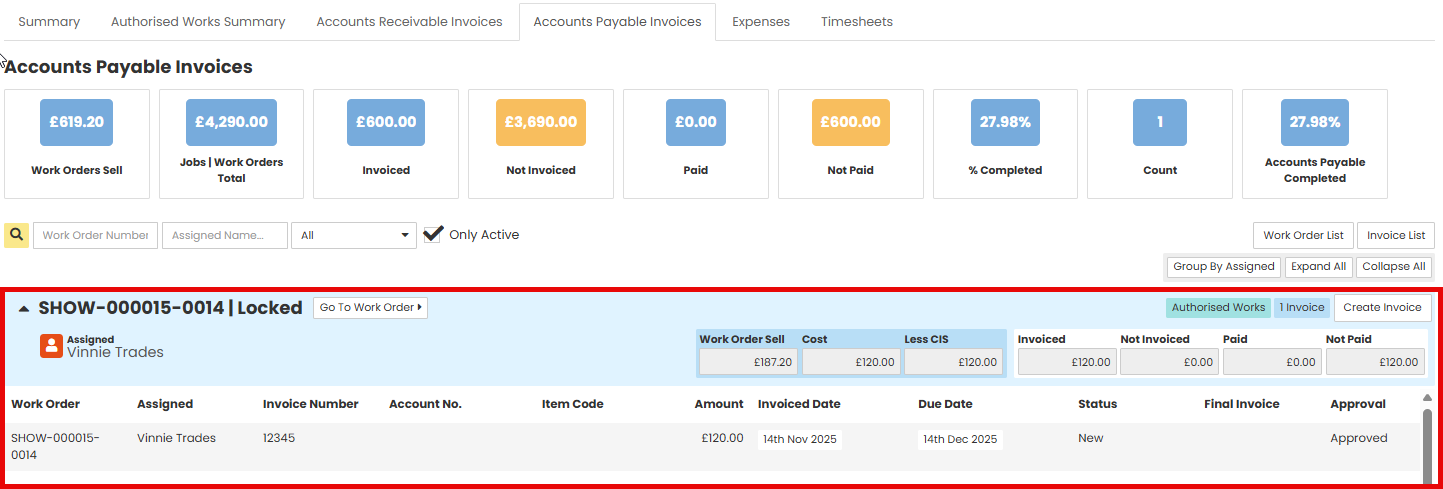
Once all fields are populated, click 'Save' at the bottom of the page to create the invoice.

The page will refresh and take you back to the Accounts Payable Invoices tab. You will be able to see the invoice as the grey line under the Work Order details
Was this article helpful?
That’s Great!
Thank you for your feedback
Sorry! We couldn't be helpful
Thank you for your feedback
Feedback sent
We appreciate your effort and will try to fix the article