22.12 Creating a New User In Contractor Workspace. Version 1.0. Last updated October 2025
Creating a New User in Contractor Workspace
1. In the left hand menu pane select Administration, a new window will open with the heading Administration and a scrollable menu below.
Scroll down the sub menu until you reach the heading Company in bold type
2. Under the Company heading scroll down and click on the sub menu option USERS, a list of existing users will display.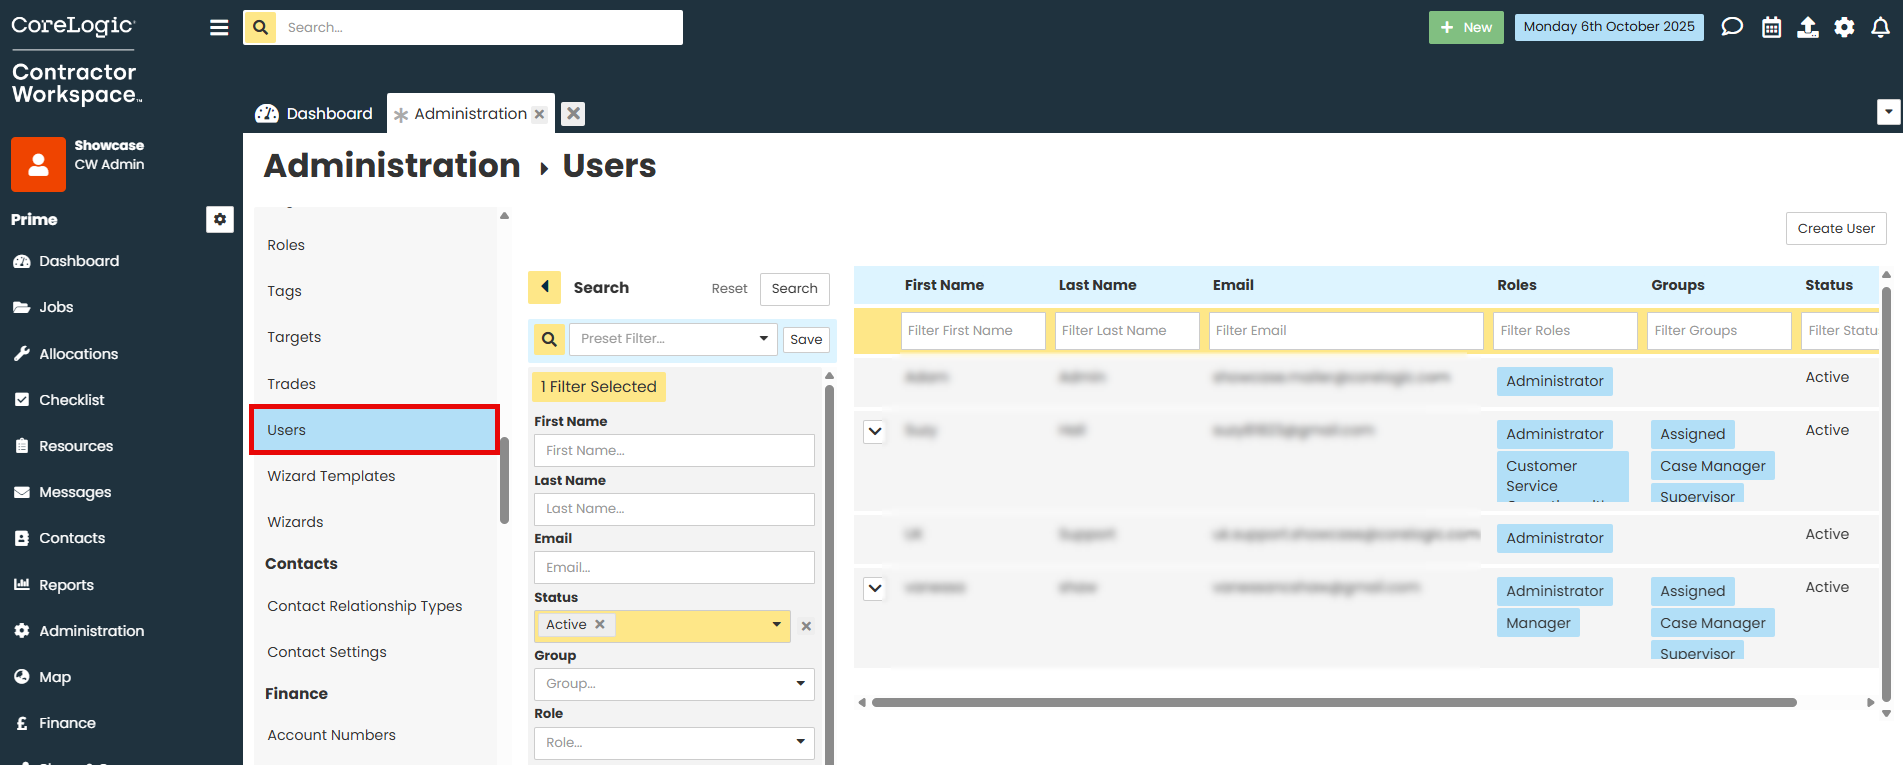
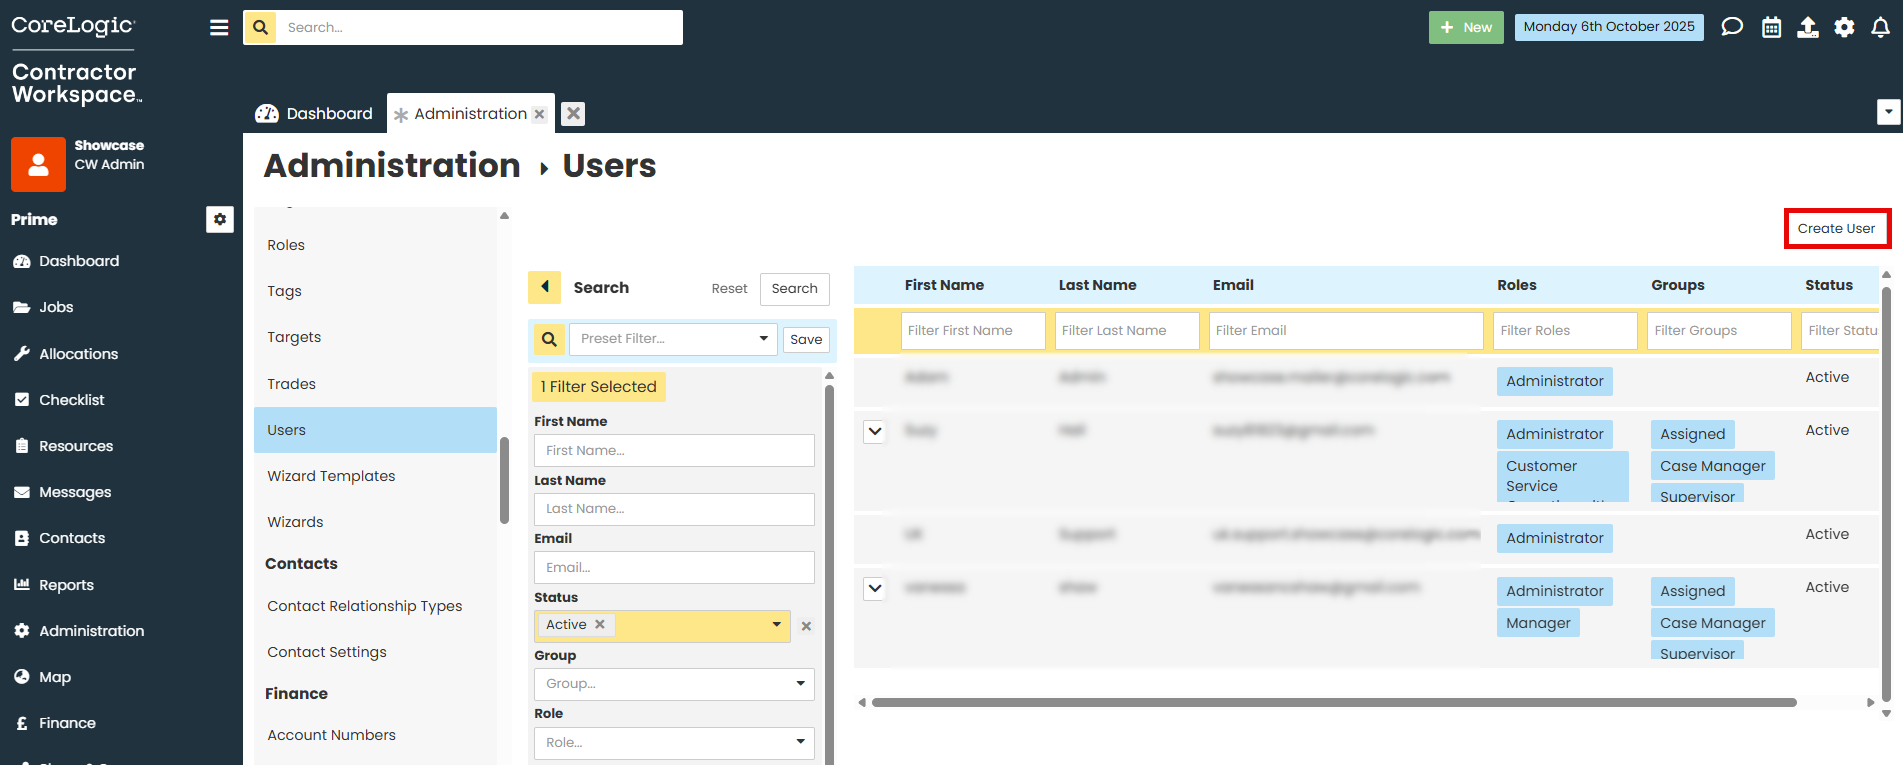
3. At the top right of the screen select Create User, this will take you to the User Details scree
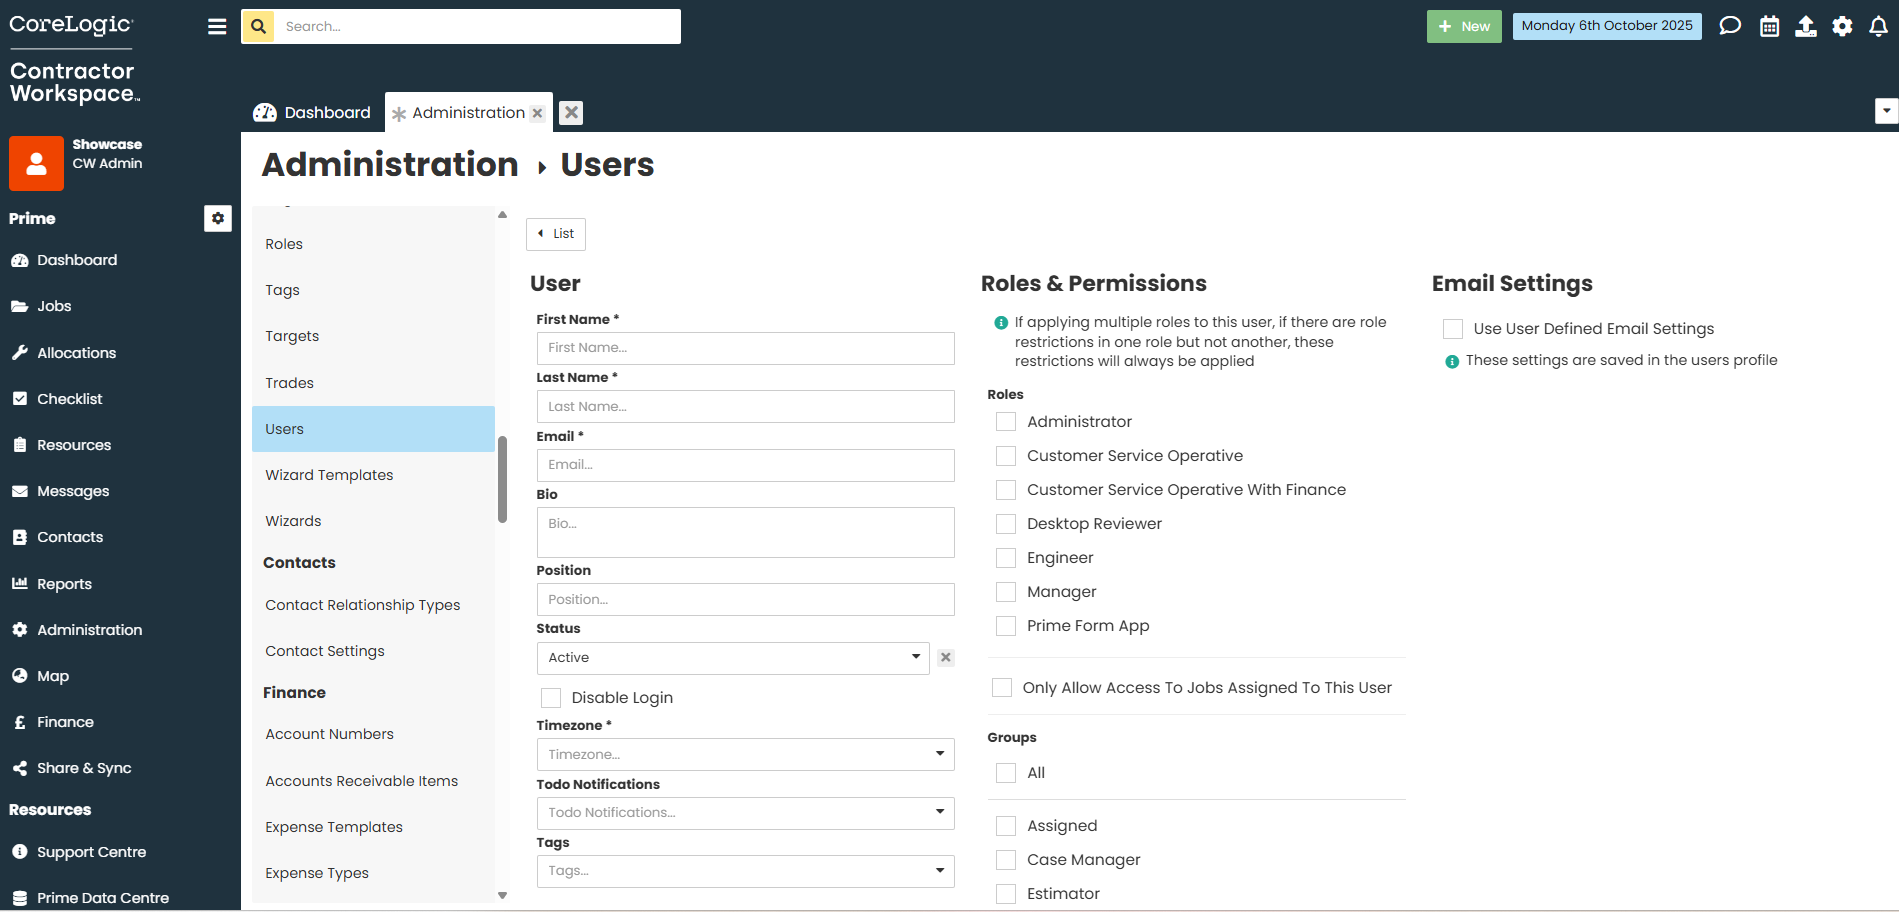
4. Populate the fields as required, all fields with an asterisk are mandatory. Note the new user's email is used to provide login access, send notifications and system communications.
5. Select the users Roles & Permissions and their applicable Groups.
Roles & Permissions set the level of access and visibility the user will have over various parts of the system. Permissions for Roles are configurable and can be set to provide higher or lower levels of access.
Specifying a Group allows the user to be selected from the dropdown list of roles assigned within a job i.e. case manager, supervisor, estimator.


6. Once the Details of the user have been populated and the Roles & Positions and Groups selected click SAVE bottom right of the screen.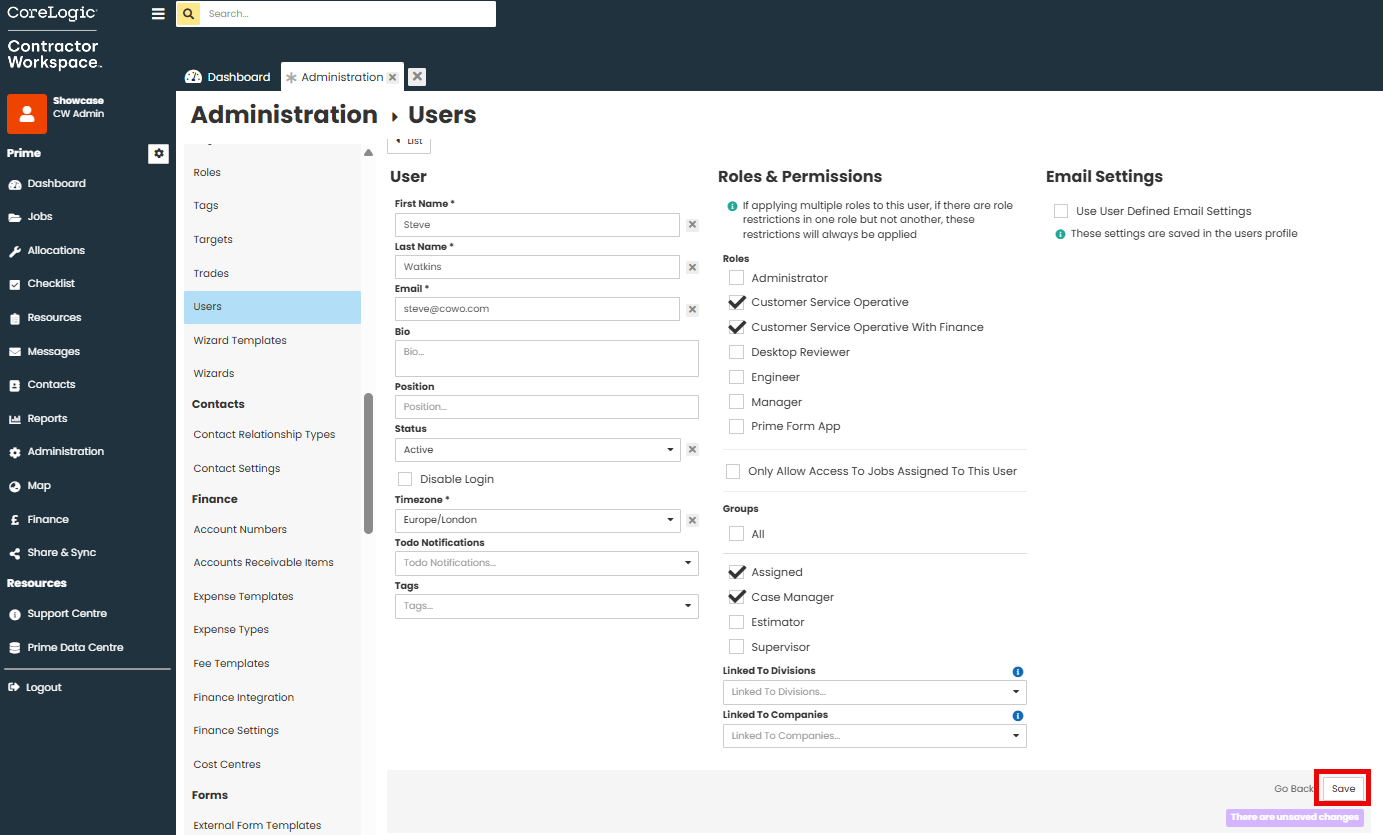
Once the details of the user are Saved this will unlock the second tab Contact Details.
Here you can populate further details about the user - salutation, position, contact number, address etc.
Each user has a linked record in Contacts, any details updated within Admin > Company > Users will also display when searching the user via the Contacts menu.
Was this article helpful?
That’s Great!
Thank you for your feedback
Sorry! We couldn't be helpful
Thank you for your feedback
Feedback sent
We appreciate your effort and will try to fix the article