39.1 How to create an expense. Version 1.0. Last updated August 2025
How To Create an Expense
To create an expense in a job, go to ‘Finance’ in the Job menu.

At the top of the page select the ‘Expense Tab.’

Here you will see a summary of the total amount of expenses that have been raised, any new expenses that are waiting for approval, have been approved or have been paid out so far on this job.

Select ‘Add Expense’ at the top right corner of the screen. Then fill in the expense form, then click ‘Save.’
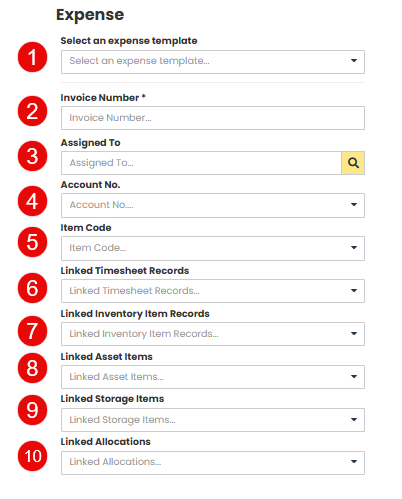
 Expense Template – if your company has expense templates you will be able to select them from the drop-down list.
 Invoice Number – invoice numbers are not automatically generated so you will need to add an invoice number manually.
 Assigned To – the assigned to drop down list option is of all the company.
 Account Number – if you know the account number, you can insert this here.
 Item Code – if you have an Item Code, you can insert this here.
 Linked Timesheet – if there are any Timesheets linked to this expense you can select this here.
 Linked Inventory Item Records – if there are any Inventory Item Records linked to this expense you can select this here.
 Linked Asset Items – if there are any Asset Items linked to this expense you can select this here.
 Linked Storage Items – if there are any Storage Items linked to this expense you can select this here.
 Linked Allocations – if there are any Allocations linked to this expense you can select this here.

 Amount – if this is not prepopulated from the template, you can input this manually.
 Includes Tax – if tax is to be included in this expense payment, please tick this box.
 Incurred Date – this is the date this expense was charged.
 Due Date – the date the payment is due to be paid.
 Type – to choose the pre-populated list of type of expenses.
 Description – notes of what the expense is for.
 Approval – a drop down list to select whether this expense has been approved or not.
 Approval Note – If applicable add approval notes
 Status – you have the option to go in and change the status once it has been approved to new or paid.
 Linked Documents – you may add any documents linked to the expense.
Once all relevant fields have been completed, select Save
Was this article helpful?
That’s Great!
Thank you for your feedback
Sorry! We couldn't be helpful
Thank you for your feedback
Feedback sent
We appreciate your effort and will try to fix the article